Sunday, November 11, 2012

ANTIQUE CHAIR MAKEOVER


This old chair was dark and tired and screamed for a makeover.

So, I gave it a couple coats of pure white paint.
Then, added some freehand flowers in pinks, mauves, and lavender.


Add green leaves and a curl or two.


Let a blue ribbon wind and twine among the flowers.


A little distressing and a little antiquing with stain to bring out the detail......


Then, after the stain has had time to dry, brush on two coats of water base varnish.


And, wha la, finished, all bright and cherry.....a pretty place to sit upon or just sit a plant upon.

What cha think?


Sharing at these parties:

http://www.ishouldbemoppingthefloor.com/2012/11/mop-it-up-mondays-42.html

http://www.oneshetwoshe.com/


Friday, November 9, 2012

CHANGE

I'm one of those people who HATES change.  But, well, I've lost my lease on my shop building.  So, I think this means lots of changes coming up in my life.  I just don't think I can move AGAIN.  I have taken a large booth in a local antique mall, so you're not completely rid of me yet.

Anyway.....all that to say that my blogging time has been cut a little short lately due to shop SALES and packing to move.  But, sounds like I might be having more time than I know what to do with soon.  We'll see.

Here are some recent pictures of my shop......that I'll be saying goodbye to.....too soon.


Say a prayer for me............that this transition will be as easy as possible.

See y'all back here soon.

Wednesday, October 24, 2012

READY FOR WINTER

I love old barns!!  Why?  I'm not sure.  But, this one just yelled to have his picture taken.


On closer look, I found that he was stocked full of corn


and hay......


all ready for those cold winter days ahead.

Monday, October 22, 2012

HAND PAINTED HIGH CHAIR


This sweet little vintage high chair really needed a face lift.  So, after a couple coats of bright white paint, I added a few freehand ribbons and flowers.


Now, I think it looks so feminine.


 After all had dried, I gave her a couple coats of water base acrylic varnish.  
I loved how the daffodils turned out. 

What cha think?

Sharing with these linky parties:

http://thediydreamer.com/2012/10/from-dream-to-reality-linky-party-39/

http://www.therusticpig.com/2012/10/creatively-tuesdays-6.html

http://www.kathewithane.com/2012/10/youre-gonna-love-it-week-27.html

Sunday, October 21, 2012

GIFT BASKET ALTERNATIVE


 What do you give a sick friend?  A gift basket?  Not if she owns more baskets than the entire Amish community.  She makes baskets herself, and, she's been collecting baskets for years.  Well, she is a seamstress, so I decided to use a sewing machine drawer.


Soooo, I started with some colorful tissue paper.  Then added my favorite cold medicine.


Next, she'll need some honey to mix with the medicine to make it go down easier........


a pretty teacup to mix it in,


then add a vintage teaspoon to stir.


Or course, chocolates make anyone AND everyone feel better.


And, a magazine.  Gotta include a magazine.  What southern lady wouldn't enjoy a copy of 'Southern Lady' magazine?


There ya have it.


Add a couple dried flowers.....a rosebud, a stem of larkspur, a head from my hydrangea bush.  Stick a bright yellow bow in for extra color and CHEER.


Well, at least I hope it brought a little cheer to her sick day.


Saturday, October 20, 2012

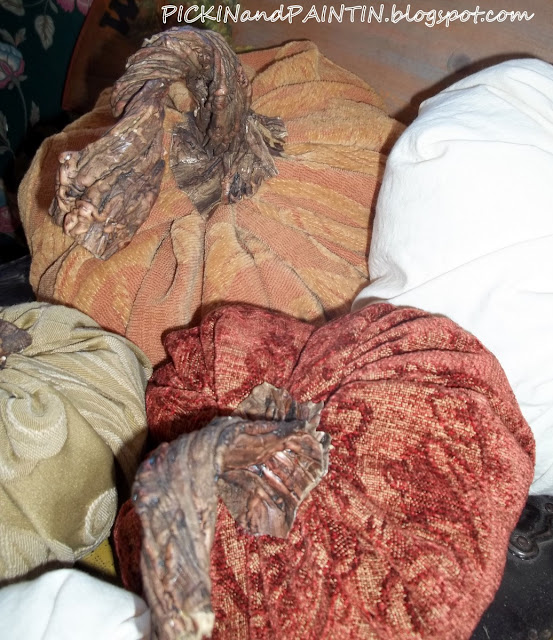
FABRIC PUMPKINS


LOOK what I just purchased for the shop.  Aren't they adorable. 


 I'd love a whole grouping for the dining room table. 


Or maybe just one.....or two.......or three sitting in a chair like you'd use a cushion.  This one with raised black velvet is my favorite.


How very creative was the person that made these??
I loved them so much, I just wanted to share them with you.  

Friday, October 12, 2012

DRIED HYDRANGEA WREATH


A few days back, I went out and cut my hydrangea and put it all in water to dry.  I've been told this is the best way.  Just wait til it starts to turn colors in the late summer.  Then, cut it and put it into water and it'll dry out naturally.  I literally had hydrangea bouquets sitting all over the house.
Then I happened across this post by Donna at Funky Junk, sooooo, it got me in the mood to make wreaths.
Mine aren't nearly as pretty as hers.  I think maybe I waited just a little too long to cut mine.  But, hey, I still think that turned out pretty good.


First I gathered my tools.  A wreath, a pair of pruners, scissors, twine or raffia comes in handy too.  I used raffia to make a loop to hang the wreath by and also tied on a few loops just to add some color.


Start by snipping the stems from the hydrangea to a shorter length which is easier to work with.  First
I thought I'd just stick the stems in.  Then I decided my wreaths would be less likely to fall apart if I used a glue gun.
HINT:  Have a little cup of water handy if you do use a hot glue gun, since it is rare that you don't stick your finger in that drippy, hot, hot stuff.  The hurt stops hurting much faster if you can stick the poor finger involved into cold water.


And, here's my first.  I love it.


Same wreath with more lighting.  I think the first is probably truer in color.


Well, I did have all the mess out already, so had to do at least two.  And, since there are still bouquets all over the house, I'll be making several more.....well, just as soon as my fingers heal.

Thanks for stopping by.  All ya'll come back soon.


Sharing with these LINKIES:


Wednesday, October 10, 2012

YOUTH BED 'AFTER'


In a RECENT POST,  I shared pictures of the original youth bed with you.  It got so much attention after setting it up in my shop, I decided to take it to have it reproduced.  And, here's that reproduction, a couple coats of paint and a glaze later.  I actually did two just alike for two little sisters.  I hope Sabree and Aubree are enjoying their new beds.


Above is the original, probably from the late 1800's to the early 1900's.  


For the 'beginning' of this process, please look HERE.


I was soooo pleased with Mr. Woodworker's results.


The color you see here........above and below.........are more like the true colors.  The base is turquoise with pink showing through, then glazed using Minwax Special Walnut.  


Mr Frog says, "Snuggle down under the covers and I'll read you a story."


This young family had already purchased this piece to go in the girls' room from me.  So, of course, we had to match the beds to it.  See the painting process on this piece HERE.


Thanks for stopping in.  Ya'll come back soon.
8-)

Linking to these parties:

Wednesday, October 3, 2012

GIRLS' DAY OUT at BELLA RUSTICA

Okay.........here are a few more pics from my Girls' Day Out at Bella Rustica.  Check my LAST POST for more pics of this fun trip to THE MILKY WAY FARM near Pulaski, Tennessee.  Hope you enjoy.


Lots of turquoise, teal, and other shades of the sea.


Happy Fall, Ya'll.


 Notice the rock walls of this great old barn.


Goodies Galore!!!


 A bicycle propped against a picket fence just shouts home.


 What is it about chippy paint that we love so?


Imagine sleeping on those bed springs.  OUCH!


 Is that a tomato cage under her skirt???


And this old washtub???  A hanging lamp.  WOW.  Who thought of that?


I'm lovin that POP of GREEN.


 More BURLAP.


And, this is the cutest tablecloth I think I've ever seen.  Great shop display, don't cha think?


Another cute display was this cowgirl jewelry thingy.


More display ideas....an old gate, and a vintage door.


Then there were MORE booths OUTSIDE,


with eeeeven more treasures,


and more burlap.
Don't cha just love this color?

  I'd love, love, love to have this old truck.


 Paintings on Canvas.......PERFECTLY PRIMITIVE.
No, that wasn't her name, just my thought on her art.


So many fun things to see.


 And, only so much money to spend.


 Ahhh, but I've heard that they're already planning to be back here at The Milky Way Farm next year.


A Rosary with a Prom Dress???  I don't know about that??


THANK YOU for visiting with me.  I hope you enjoyed the show as much as I did.  See you back here soon.
8-)